/INSTRUCTIONS
Your turn
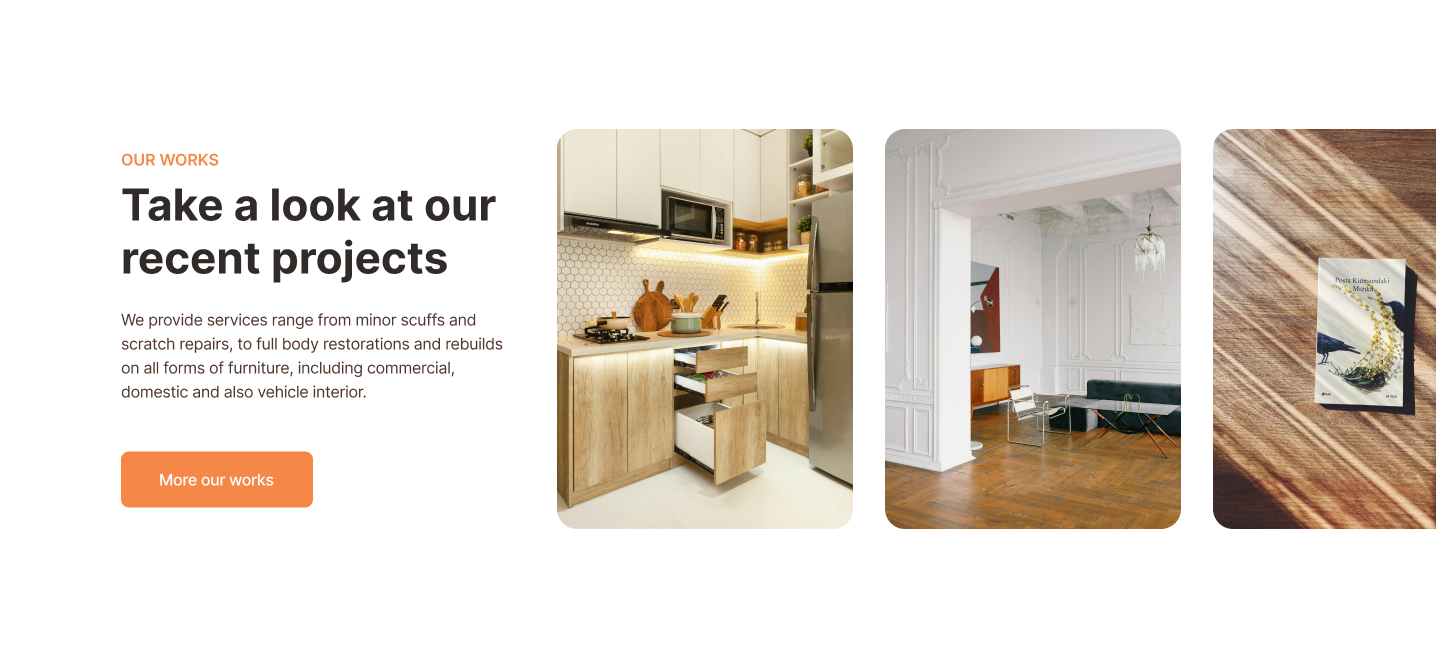
Replacing a section
Step 1: Choosing to Rebuild the Section from Scratch
Rebuilding the Project Showcase section from scratch allows for greater flexibility and customization. It ensures that the section aligns perfectly with your design vision and meets the specific needs of your business.
To rebuild the section from Empty:
- Remove the Existing Section: Select the existing Project Showcase section and delete the section to start fresh.
- Add a New Section: Hover between sections and click + Add Section and select Empty to create a blank section.
Step 2:
Adjust Section Layout and Columns
Proper spacing and column widths are crucial for a balanced and visually appealing layout.
- Set Spacing Between Columns: Select the new section, and in the design panel, set Spacing between columns. (ex: set to 5%).
- Adjust Column Size: Select a column and set its width. (ex: Select the first column and set its width to 40%. Select the second column and set its width to 55%).
Step 3:
Updating Content and Adding a Button
Update the content and add a button:
- Add Widgets to the First Column: From the Widgets panel, add desired functionality. (ex: Add four widgets sequentially: text, text, text, button).
- Update Text Widgets:
- Replace placeholder text with updated copy.
- Format text widgets.
- textA: Set as Bold, font color Dark Orange, font size 14.
- textB: Set as heading 2.
- textC: Leave as is.
- Customize Button:
- Update button text. (ex: to “More of our works”).
- Select where the button links to (e.g., a website address).
- Adjust the button height. (ex: to 50px).
Step 4:
Add and Configure the Media Slider Widget
A media slider widget is perfect for showcasing multiple project images in an interactive and visually appealing way.
To configure the Media Slider widget:
- Add Media Slider Widget: Add the Media Slider widget to the second column.
- Configure Media Slider Content:
- Open Media Slider Content.
- Delete all placeholder slide images.
- Click + Add Slide and + Click to add media.
- Select images from the media manager. (ex: hp-featuredProject-A.jpeg, hp-featuredProject-B.jpeg, hp-featuredProject-C.jpeg.)
- Update Slide Details:
- Set visibility of the button for each image. (ex: Hide).
- Set Media Slider Layout:
- Select the Media Slider widget.
- Choose a layout style in the design panel. (ex: the second layout style with three long cards.)
- Set Number of columns. (ex: set to 2).
- In
Navigation indicators, select
Type
as
Bullet
In this lesson, we'll guide you through customizing the Project Showcase section of the electrician template. This section is crucial for highlighting your best work and attracting potential clients. We'll cover rebuilding the section from scratch, adjusting layout and columns, updating content, adding buttons, and configuring a media slider widget.
Follow the instructions below to recreate this section: